Showing posts with label Caress. Show all posts

Tuesday, October 9, 2012

Cath Kidston inspired vintage floral nails tutorial ^_^


Recently my boyfriend bought me a faux Cath Kidston phone case, I really like Cath Kidston designs which are mostly pastel vintage florals. I find them to be sweet looking and feminine. Since I'm in my pastel phase still I decided to make vintage rose nails.

What I used:
Jocarste nail polish in #36 - flesh with peach tones
Light old rose perfume nail polish, (no brand name check the pic above)
Sassy nail art polish in Pink
Caress nail polish in Obsession
Acrylic paints in Titanium White, Viridian and Crimson.
Sponge
Toothpick
Small nail art brush
Top Coat

I first started with a flesh with peach tones nail polish as my base color. Then I sponged in the same color on my entire nail, this will help to make the base to be more opaque too.
I did another layer of sponging on my whole nail using a light old rose pink. The reason I used the sponging technique on the second layer of polish is to create an uneven base for the old rose pink polish. I didn't want the old rose pink to take over the whole nail as I am also sponging it on my entire nail as well.
I hope I'm making sense.... hahaha!
After that I used one coat of fast drying top coat to slightly smoothen the surface then let it dry.


 Using a large sized dotting tool and a dark rose pink polish I made uneven and different sizes of circles. This is really easy to make because it doesn't have to look perfect. The number of dots would depend on the size of your nail bed.


Next use a pink nail polish that is lighter than the dark rose pink but slightly darker than the base color. If you have a good lot of pink nail polish on your stash this would be easy but if you don't you can try mixing the dark rose pink with your base polish to create one. Maybe a 1:2 or 3 ratio, 1 being the dark rose pink.
Using the same dotting tool, make the same uneven circles close or overlapping a little to the dark rose pink. You can place two dots of light pink near a dark one which is what I did in here.
Let it completely dry.


Take a white and red acrylic paint then mix them to make a nice pinkish white. Using a toothpick (because my thinnest and smallest brush is not thin enough) I made small dots and half swirls inside the pink dots, this will be the petals. I learned this technique from CutePolish when she did a video tutorial on Easy Vintage Rose Nail Art.


 This time mixing a green and white acrylic paint to make a light mint green to use for the leaves. This time I used my smallest nail art brush to create small abrupt thin lines around the roses, see my thumb and pointer finger. Using just the green acrylic paint place small dots with your brush where the roses meet the leaves, see my middle finger to my pinky. This would create a contrast to make the roses more visible.
Then let it completely dry again.
Apply top coat so the acrylic paint won't wash off. ^_^


 Voila! 
This is one of the very few free hand nail art I can do with both my right and left hand, haha!

I used three coats of top coat because my top coat's texture dries thin :( but I think if you use Seche Vite one layer would suffice ^_^


This is my faux Cath Kidston case where I got the inspiration from!


A photo collage I made showing my nails, a Cath Kidston theme I got from ifansland.com and my case.  ^_^


Thanks a lot for hanging out here!

Monday, September 17, 2012

Using metallic pens for nail art ^_^

Sorry I haven't been posting much on here, I've fixed my phone a few days ago and have been tweaking it since then. I'm just sad that my phone contacts can't be retrieved, it's my own fault anyway for not making contacts back up. Anyway.....

...in the intervals of setting up my phone I found that metallic pens can be used for nail art as well ^_^
Like I've said I'm very bad with free hand nail art, so this discovery has given me a small slice of hope in doing free hand designs.

So here's what I started with...


Two coats of Etude House BL501, it's a creme with a slight sheen to it. It's a bit streaky or maybe I just didn't apply it well enough.


I sponged one coat of Caress in Obsession on half of the nail, it's semi sheer with a thin consistency like most of their polishes.


Then I sponged Pulantn nail color in lilac (it doesn't really have a name, the number of polish under the bottle came off :/) on the tips. After it dried I swiped one coat of clear top coat.


So here it is.... I mainly used a copper gold metallic pen then a metallic blue just to see how it'll look like. I really liked how this turned out, I kinda wanted to call it 'Pastel Autumn' ^_^
I've never experience Autumn because we only have sun and rain here in the Philippines  :(


There's a downside to this though, the pens don't really dry up on my nails even if I wait for more than two minutes. On this nail I accidentally smudged it so I just wiped it off, it left a streak/mark on nail so I just drew on top of it again.

I applied top coat the way I apply top coat on stamped nails. Generously and the brush barely touching the nail so as not to smudge the design. I guess waiting for at least 3 minutes prior to applying top coat would suffice and drying it using a fan won't hurt :)


I then applied two coats of Caress in Tangerine Glitter, which is a nice dark orange glitter. I lurve it!!!


Just another pic of the nails with the glitter, this looked so much better in real life.


Like I said my phone is doing better ^_^

Thanks for hanging out here!

Sunday, August 5, 2012

Caress Nail Polish Tiny Haul ^_^


Mainly, I only wanted the glitter polish but when I saw these other shades I just had to get them ^_^


First up is Avocado, most if not all Caress polishes are really sheer. You would need at least 3 coats for it to be opaque but this is not a downside for me because they could easily pass up as jelly polishes because of their sheerness.
When I saw Avocado I immediately thought of making a glitter sandwich, I did not own a jelly green so I'm pretty sure this would do just fine.


 Next is Obsession, it's a medium light pink that's a little more opaque than Avocado. I'm not sure if this would be good for making glitter sandwich but the color looks really pretty, I just hope it would look good on my nails. I really like pinks, specially light ones but not all pinks look good on my nails. :(


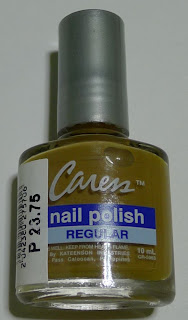
Third is Flamingo, this is a dark khaki shade. I don't know why I bought this color, well I guess it looked unique to me because I don't have a color like this on my stash. I'm a bit confused why it's called Flamingo, aren't they supposed to be bright pink? Anyway I was thinking I may be able to use it for some nail art designs because you'll never know when you might need a khaki right? Or not. Hahaha ^_^


Last is Christmas Polka, this is the one that I originally wanted to buy. I've seen this before like months ago but I didn't get it because I had an abhorrence of glitter polishes then. Now that taking off glitter polishes is easier I just had to get this ^_^
This has small silver glitters with a mix of purple and red hex glitters. The base is clear which is perfect for glitter sandwiches.

I have not used this polishes yet that's why there are no swatches but I will give a more detailed review if and when I get to use them.

Thanks for hanging out here! ^_^

Friday, July 6, 2012

My first jelly glitter sandwich ^_^


I love how this turned out, well maybe I could've used more glitters ^_^
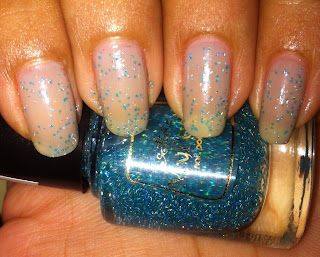
I used three different polishes, first I did one coat of Caress in Diamond Gay which is a sheer pale gray color. After that I placed one coat of My Posh in Blue Glitter, the glitters are quite small but they are pretty. Then I sandwiched it with Diamond Gay again, I wanted a luminescent effect so I placed one coat of Etude House polish in PK015 which is a very sheer pink that has fine shimmers of goldish pink.
Of course this mani would not be complete without some stamping action, I used BM11 and a pink stamping polish to make it look more sweet. :)
Gray and pink always look good together IMO.
I think I'll be doing more jelly glitter sandwich manis from now on, I do have some more sheer polishes I just hope that it would turn out as good as this one. ^_^